For an explanation with screenshots go to the ‘Detailed explanation’ part lower on this page.
First part is configuration in Windows
Open in Windows the Devices and Printer window (Control Panel\All Control Panel Items\Devices and Printers)
Connect the USB cable between your pc and the printer.
And off course the power supply.
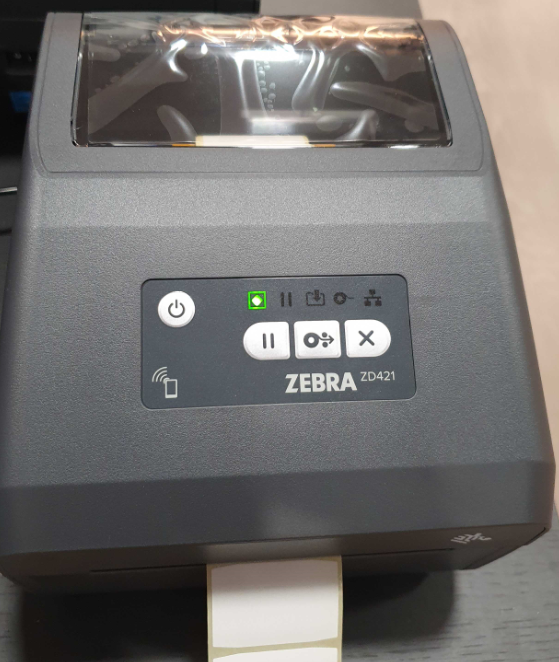
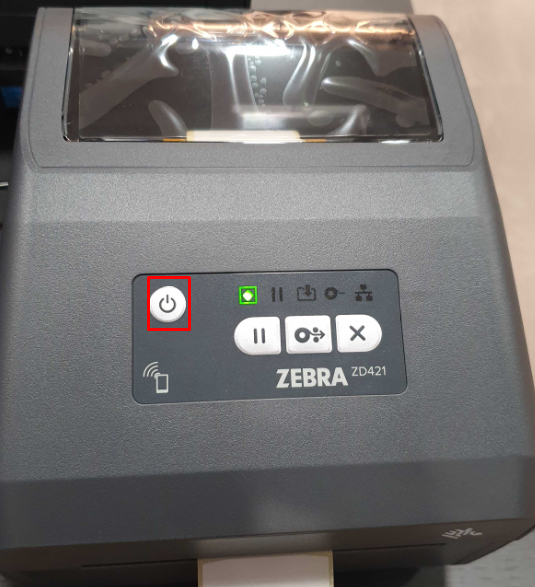
Put printer online.
Windows will install the printer driver automatically
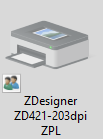
Wait until you see the printer appear in the ‘Devices and printers’ window.
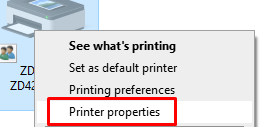
(this can take some minutes !!)Right click on the printer and select Printer properties
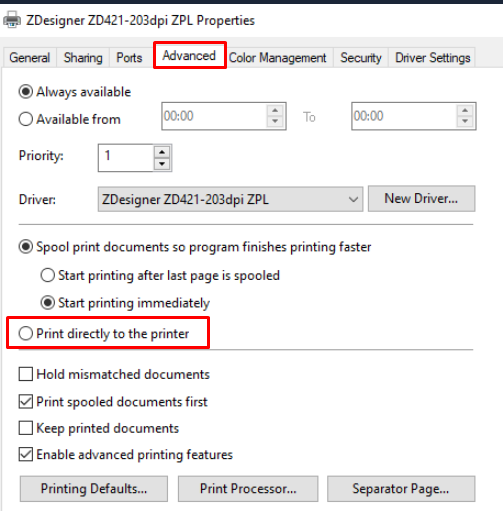
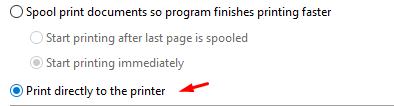
Select tab ‘Advanced’ and select the option ‘Print directly to the printer’
Next step is changing the printer in the Medialog configuration page
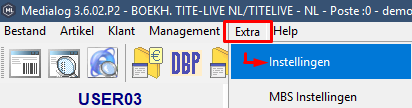
Open Medialog
(NL) click menu ‘Extra / Instellingen'
(FR) click menu ‘Outils / Configuration’
Password : 'Medialog'
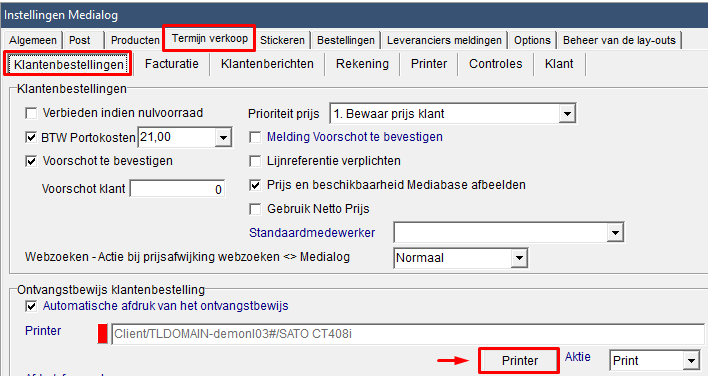
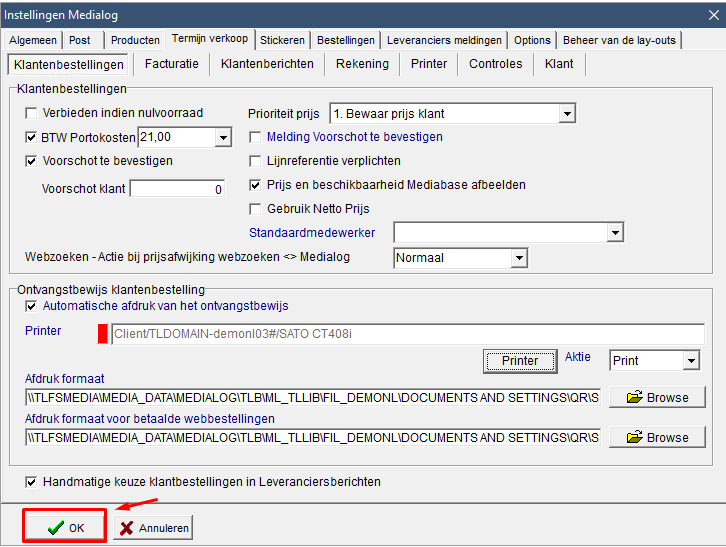
Select tab ‘Stickeren’
‘Barcodeprinter’ must be checked 'v'
Click on button [Printer]
Select your Printer - ZEBRA printer (ZDesigner…)Click on the ‘arrow’ icon to show a list of available printers
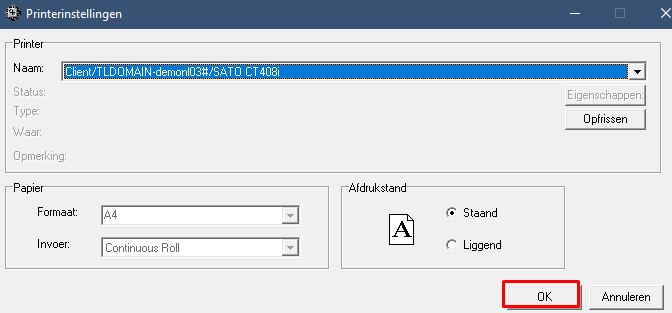
Here you have to choose the ZEBRA printer (ZDesigner…)Next click on tab ‘Termijnverkoop’ (nl) - ‘Vente à terme’ (fr)
and click on button Printer (nl) - Imprimante (fr)Normally you should see immediately the correct printer (choosen in previous step).
If not select the Zebra printer.
Click OK buttonFinally click on the bottom left [OK] button & close the Medialog configuration page
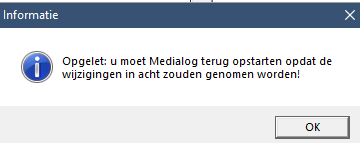
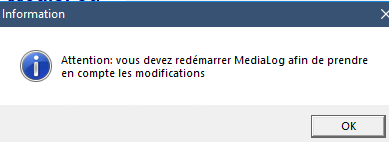
You should get a warning that you will have to restart Medialog.
!!! If you don’t get this warning then your changes are ‘not’ saved.
In that case you have to open the Medialog config page again and check everything (see step 6)
13. Now you can start testing the new printer.
Start with printing tickets from within the ‘Artikelbeheer’(nl) - ‘Fiche Article’ (fr) page in Medialog.
If it doesn’t print at all then you should check previous steps again.
If it prints and the tickets don’t have the same look as before (too big left margin or top margin), contact helpdesk for further assistance.
By preference create a servicedesk ticket and mention following :
1. which printer you installed
2. on which user(s) (= login) for example ‘demo0102’
3. your remarks (e.g. left margin too big, …)
A member of helpdesk will then contact you.
If not possible to create a servicedesk ticket then contact us by phone :
Nederland:+31 (0)85 20 88 368
België/Belgique: + 32 (0)69 89 00 09
Detailed explanation
First part is configuration in Windows
1. Open the Devices and Printers configuration window
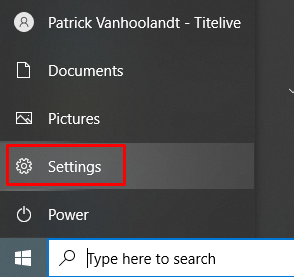
Click the Windows-icon (bottom left)

Click Settings icon
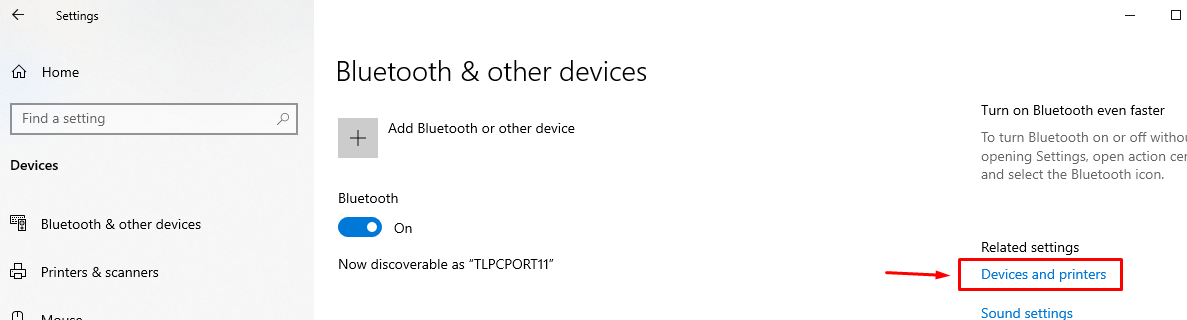
In next window ‘Windows Settings’
select ‘Devices’ (Bluetooth, printers, mouse)

On next window click on ‘Devices and printers’ (right pageside)
Next window is ‘Devices and Printers’ page

Next step is connecting the USB cable between your pc and the printer
And off course the power supply.
Put printer online
Windows will install the printer driver
automatically
Wait until you see the printer appear in the ‘Devices and printers’ window.
(this can take some minutes !!)
Right click on the printer and select Printer properties
Select tab ‘
Advanced’ and select the option ‘Print directly to the printer’
Next step is changing the printer in the Medialog configuration page
Open Medialog
click menu ‘Extra / Instellingen' (nl)
click menu ‘Outils / Configuration’ (fr)
Login with password ‘medialog’
Select tab ‘Stickeren’ (nl) - ‘Etiquettage’ (fr)
‘Barcodeprinter’ (nl) - ‘Imprimante étiquette’ (fr) must be checked 'v'
Click on button [Printer] (nl) - [Imprimant] (fr)


Click on the ‘arrow’ icon to show a list of available printer
Here you have to choose the ZEBRA printer (ZDesigner…)


Next click on tab ‘Termijnverkoop’ (nl) - ‘Vente à terme’ (fr)
and click on button Printer (nl) - Imprimante (fr)
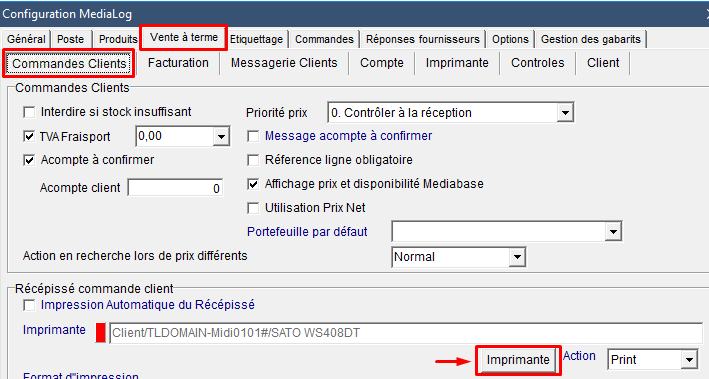
10. Normally you should see immediately the correct printer (choosen in previous step).
If not select the Zebra printer.
Click OK button
11. Finally click on the bottom left [OK] button and close the Medialog configuration page
(X on top right corner)
12. You should get a warning that you will have to restart Medialog.
!!! If you don’t get this warning then your changes are ‘not’ saved.
In that case you have to open the Medialog config page again and check everything (see step 6)
13. Now you can start testing the new printer.
Start with printing tickets from within the ‘Artikelbeheer’ (nl) - ‘Fiche Article’ (fr) page in Medialog.
If it doesn’t print at all then you should check previous steps again.
If it prints and the tickets don’t have the same look as before (too big left margin or top margin), contact helpdesk for further assistance.
By preference create a servicedesk ticket and mention following :
which printer you installed
on which user(s) (= login) for example ‘demo0102’
your remarks (e.g. left margin too big, …)
A member of helpdesk will then contact you.
If not possible to create a servicedesk ticket then contact us by phone :
Nederland:+31 (0)85 20 88 368
België/Belgique: + 32 (0)69 89 00 09